Blog
Plinth Blocks: What They Are and Where to Use Them

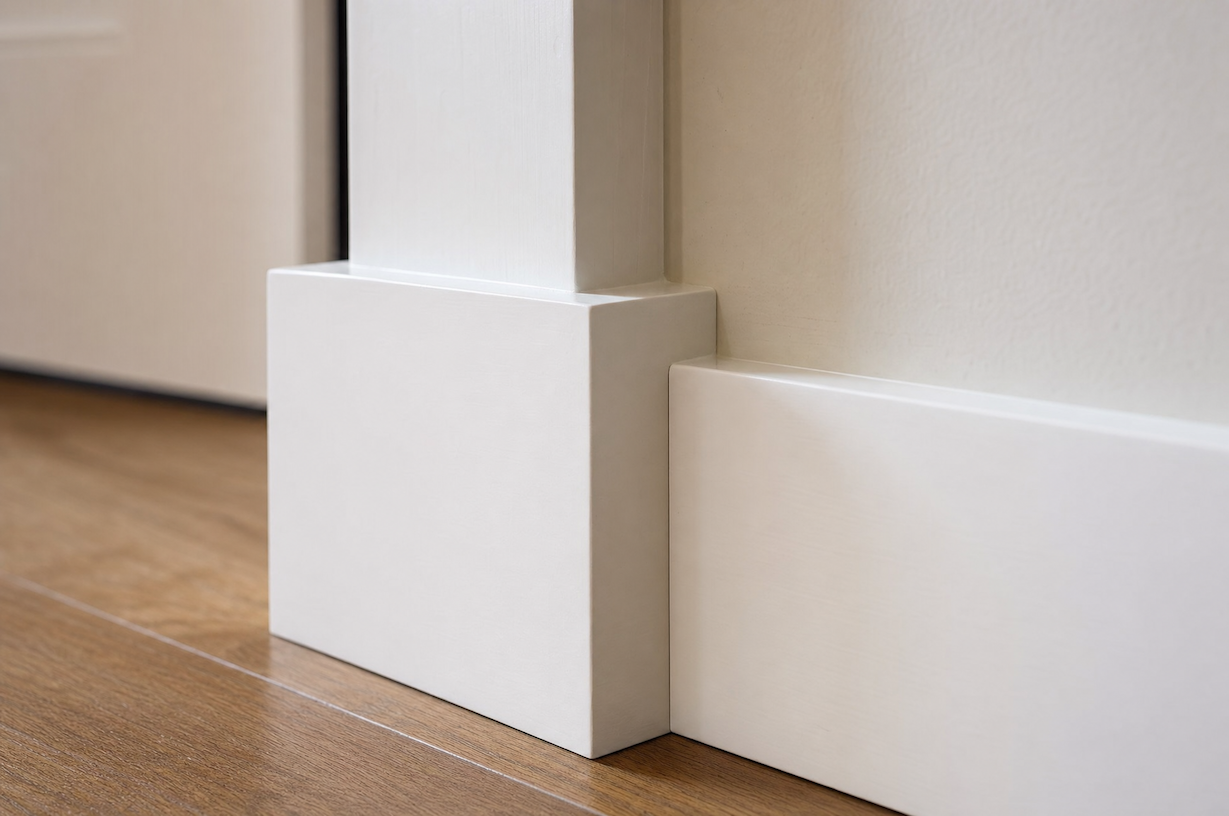
Walk into a house with well-executed trim and look at the bottom of a door. If the casing simply dies into the baseboard with a slight step and a bead of caulk, the trim was installed. If it lands on a solid block that is thicker than both pieces, the trim was designed.
That block is a plinth, and it is one of the smallest, cheapest details that makes interior trim look built in rather than applied.
At The Moulding Company, we have worked with homeowners, designers, and builders on projects of every size, and plinth blocks come up most often when someone has a problem they cannot name. Their baseboard is thicker than their casing, and the junction looks wrong.
This guide covers what a plinth block does, how to size one correctly, and when you genuinely need one.
What a Plinth Block Is
A plinth block is a short, thick block installed at the foot of a door casing, where the casing meets the floor and the baseboard.
It is wider than the casing above it and thicker than both the casing and the baseboard running into it. Those two dimensions are what make it work. Every other piece of trim in the assembly dies into the plinth rather than into another piece of trim.
Ours range from simple square blocks through to profiled tops. You can see the full selection in our plinth blocks range, which starts at a couple of dollars a piece for standard sizes.
The block is not decorative in origin. It solved a construction problem long before anyone thought of it as a style choice.
The Problem Plinth Blocks Solve
Here is the situation that sends most people looking for plinths.
You have chosen a tall, substantial baseboard, say five and a quarter inches. You have chosen a flat or lightly profiled casing around your doors. The baseboard is thicker than the casing.
Now the baseboard runs along the wall and arrives at the door. It is thicker than the casing it is about to meet, so it cannot simply butt into it. The installer has to either shave the baseboard down, build a small return, or leave an awkward step and fill it with caulk.
All three of those solutions look like compromises, because they are.
A plinth block removes the problem. Because it is thicker than both pieces, the baseboard butts cleanly into its side and the casing sits cleanly on its top. Two simple square joints replace one difficult one.
The Three Sizing Rules
Almost every bad plinth installation breaks one of these. They are simple enough to check in a showroom with a tape measure.
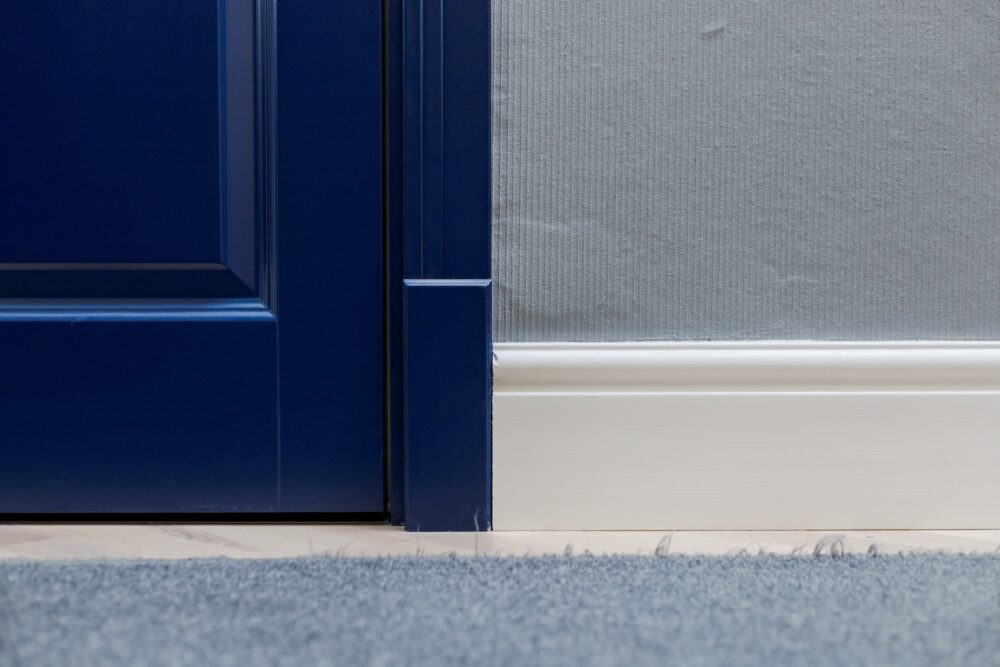
- Thicker than both. The plinth must be thicker than the casing and thicker than the baseboard. If it is flush with either one, the detail disappears and the block looks like a mistake.
- Wider than the casing. The plinth should be wider than the casing sitting on it, typically by a quarter to half an inch on each side. Equal width looks accidental.
- Taller than the baseboard. The plinth should finish above the top of the baseboard, usually by one to two inches, so the baseboard has somewhere clean to land.
A worked example. With a five and a quarter inch baseboard at three quarters of an inch thick, and a three and a half inch casing at eleven sixteenths, you want a plinth roughly four inches wide, seven inches tall, and at least seven eighths of an inch thick.
If you are still choosing the pieces around it, our guides to door casing styles and baseboard moulding styles will help you settle the dimensions the plinth has to work with.
Plinth Blocks and Rosettes: The Butt-Joint System
Plinths rarely travel alone. Their natural partner is the rosette, a decorative square block installed at the top corners of the casing.
Together they create what is called a butt-joint casing system, and it changes the way the whole door is trimmed. Instead of mitring the casing at forty-five degrees around the top corners, each leg of the casing runs straight and dies into a block.
The practical benefits are real:
- No mitres to cut, which removes the single most common source of visible trim failure.
- No mitres to open up as the wood moves through the seasons.
- Casing legs can be cut square, which is far more forgiving on out-of-plumb door jambs.
- Damaged sections can be replaced without disturbing the whole casing.
This system suits Victorian, Craftsman, and Colonial Revival houses particularly well, which describes a large share of the housing stock across Northern California. Our rosettes are made to pair with the same casing profiles as the plinths.
When You Need One and When You Do Not
Plinths are not mandatory. Being honest about when they help is more useful than selling them into every situation.
Use a plinth block when:
- Your baseboard is thicker than your casing.
- Your baseboard is tall, roughly five inches or more.
- The house is Victorian, Craftsman, Colonial, or Farmhouse in character.
- You are already using rosettes at the top corners.
- The doorway takes abuse, such as a mudroom, a hallway, or a rental property, where a solid block protects a vulnerable corner.
Skip the plinth block when:
- Your casing is thicker than your baseboard, which is common with modern flat stock.
- The house is contemporary and the trim scheme is deliberately minimal.
- Your baseboard is short, under about three and a half inches, where a plinth will look oversized.
- You are matching existing trim in a house that has never had them.
That last point matters more than it sounds. Adding plinths to two doors in a house where the other twelve do not have them creates an inconsistency that reads as unfinished.
Styles: Plain, Chamfered, Stepped
Plinth profiles are simple, and the differences are subtle but visible.
Plain square blocks are flat with a square top. They suit Craftsman, Shaker, and modern traditional interiors, and they are the most forgiving choice when you are unsure.
Chamfered blocks have an angled cut across the top edge. The chamfer sheds dust, softens the silhouette, and shows up frequently in Colonial and Farmhouse work.
Stepped or profiled tops carry a small ogee, cove or bead across the top. These belong in Victorian and more formal traditional interiors, and they look best when the casing above them carries some profile too.
One guideline holds across all three: the plinth should be simpler than the casing, never more decorative. It is a base, and a base that outshines what it supports looks wrong.
Where Else Plinth Blocks Belong
Doors are the obvious application, but not the only one.
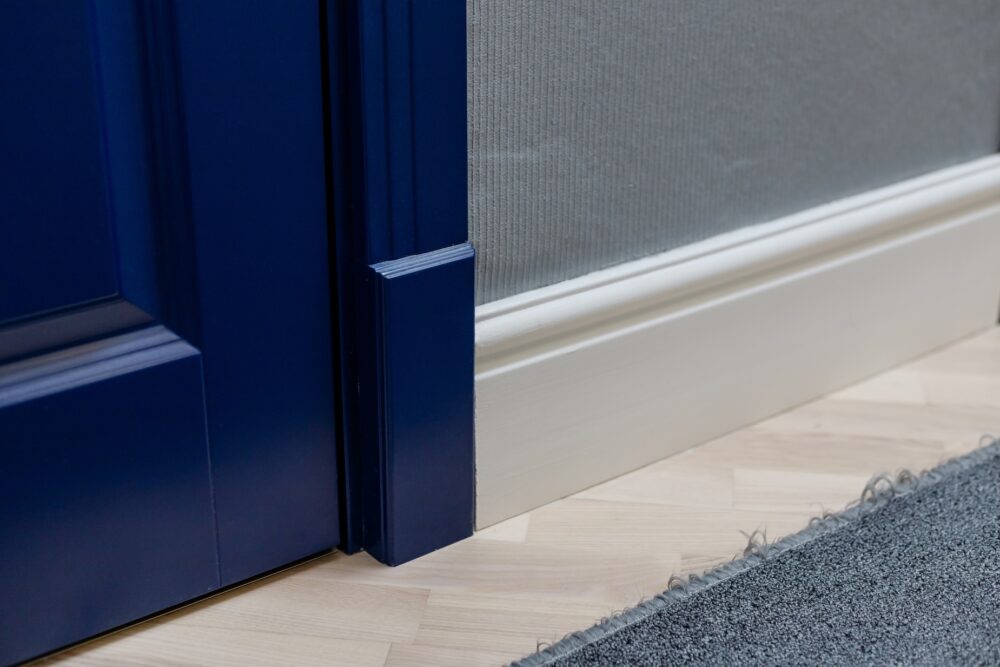
Cased openings, meaning wide doorways with casing but no door, benefit even more than doors do. The opening is usually wider and the trim more visible, so the base detail carries more weight.
Column bases use the same logic. A column landing directly on the floor looks unresolved. A plinth gives it a foot.
Window casings that run to the floor, common in older Northern California houses with tall double-hung windows, take plinths in exactly the same way as doors.
Staircase newel posts occasionally take a plinth where the post meets the floor, particularly in Victorian work.
Installation: Order of Operations
Plinths go in early, and getting the order wrong causes most of the problems we hear about.
- Fit the door jamb and set the reveal, the small consistent margin between the jamb edge and the casing.
- Install the plinth blocks first, plumb and tight to the floor. Everything else is measured from them.
- Cut the casing legs square and stand them on top of the plinths.
- Install the rosettes and the head casing if you are using a butt-joint system.
- Run the baseboard last, butting it into the side of each plinth.
If the floor is out of level, scribe the bottom of the plinth to the floor rather than shimming it. A gap under a plinth is very visible, and no amount of caulk hides it convincingly.
Our guide to trim installation order covers how this fits into the sequence for a whole room.
Material and Finish
Most plinths are painted, which makes paint-grade material the sensible default. Poplar and paint-grade softwood take primer cleanly and hold a crisp edge.
MDF plinths are stable and economical, and they produce an exceptionally smooth painted finish. Keep them away from floors that get wet mopped, since the bottom edge is the first thing to wick moisture.
Hardwood plinths are the right call for stained work, and they need to match the species of the casing they support.
Whatever the material, seal the bottom end grain before installation. It is the surface closest to the floor and the one nobody can reach afterwards.
Common Mistakes
- Buying a plinth the same thickness as the casing, which erases the entire point of the detail.
- Buying one the same width as the casing, which looks like an error rather than a decision.
- Making the plinth shorter than the baseboard, leaving the baseboard nowhere clean to land.
- Choosing a plinth more ornate than the casing above it.
- Installing them on some doors and not others in the same house.
- Leaving the bottom end grain unsealed on an MDF block, then wet mopping the floor.
How We Help Customers Choose at The Moulding Company
When someone asks us about plinth blocks, we ask for three numbers before anything else: baseboard height, baseboard thickness, and casing width.
Those three figures determine the plinth almost completely. Everything after that is style, and style is the easy part.
We also ask whether rosettes are in the plan, because plinths and rosettes are a system. Using one without the other is possible, but the door reads better when both ends of the casing are resolved the same way.
Across our four Northern California showrooms, we keep plinths, casings and baseboards on the same racks so you can stand them together and see the thickness step before you order. That is the check that prevents almost every plinth mistake.
Final Thoughts
A plinth block is a small piece of wood that solves a specific problem: how a thick baseboard meets a thinner casing without looking like a compromise.
Get the three dimensions right, thicker than both, wider than the casing, taller than the baseboard, and the detail does its job quietly for the life of the house. Get them wrong and the block draws attention to exactly the junction it was meant to resolve.
At The Moulding Company, we think details like this are where trim stops looking applied and starts looking designed. They cost very little and they change how the whole doorway reads.
Frequently Asked Questions (FAQs)
A plinth block sits at the base of a door casing, where the casing meets the floor and the baseboard. It gives a thick baseboard a clean place to terminate and gives the casing a solid base to stand on, replacing an awkward joint with two simple square ones.
Thicker than both the casing and the baseboard that meet it. If the plinth sits flush with either piece the detail disappears. A quarter of an inch of extra thickness is usually enough to read clearly.
You need one when your baseboard is thicker than your casing, or when your baseboard is roughly five inches or taller. If your casing is thicker than your baseboard, or the trim scheme is deliberately minimal, you can skip it.
A plinth block sits at the bottom of the casing, at floor level. A rosette sits at the top corners where the vertical and horizontal casing meet. They are usually used together in a butt-joint casing system that avoids mitred corners entirely.
Taller than the baseboard it meets, usually by one to two inches, so the baseboard has a clean surface to butt into. With a five and a quarter inch baseboard, a plinth around seven inches tall works well.