Blog
What Is Backband Moulding? The Cheapest Way to Upgrade Your Casing

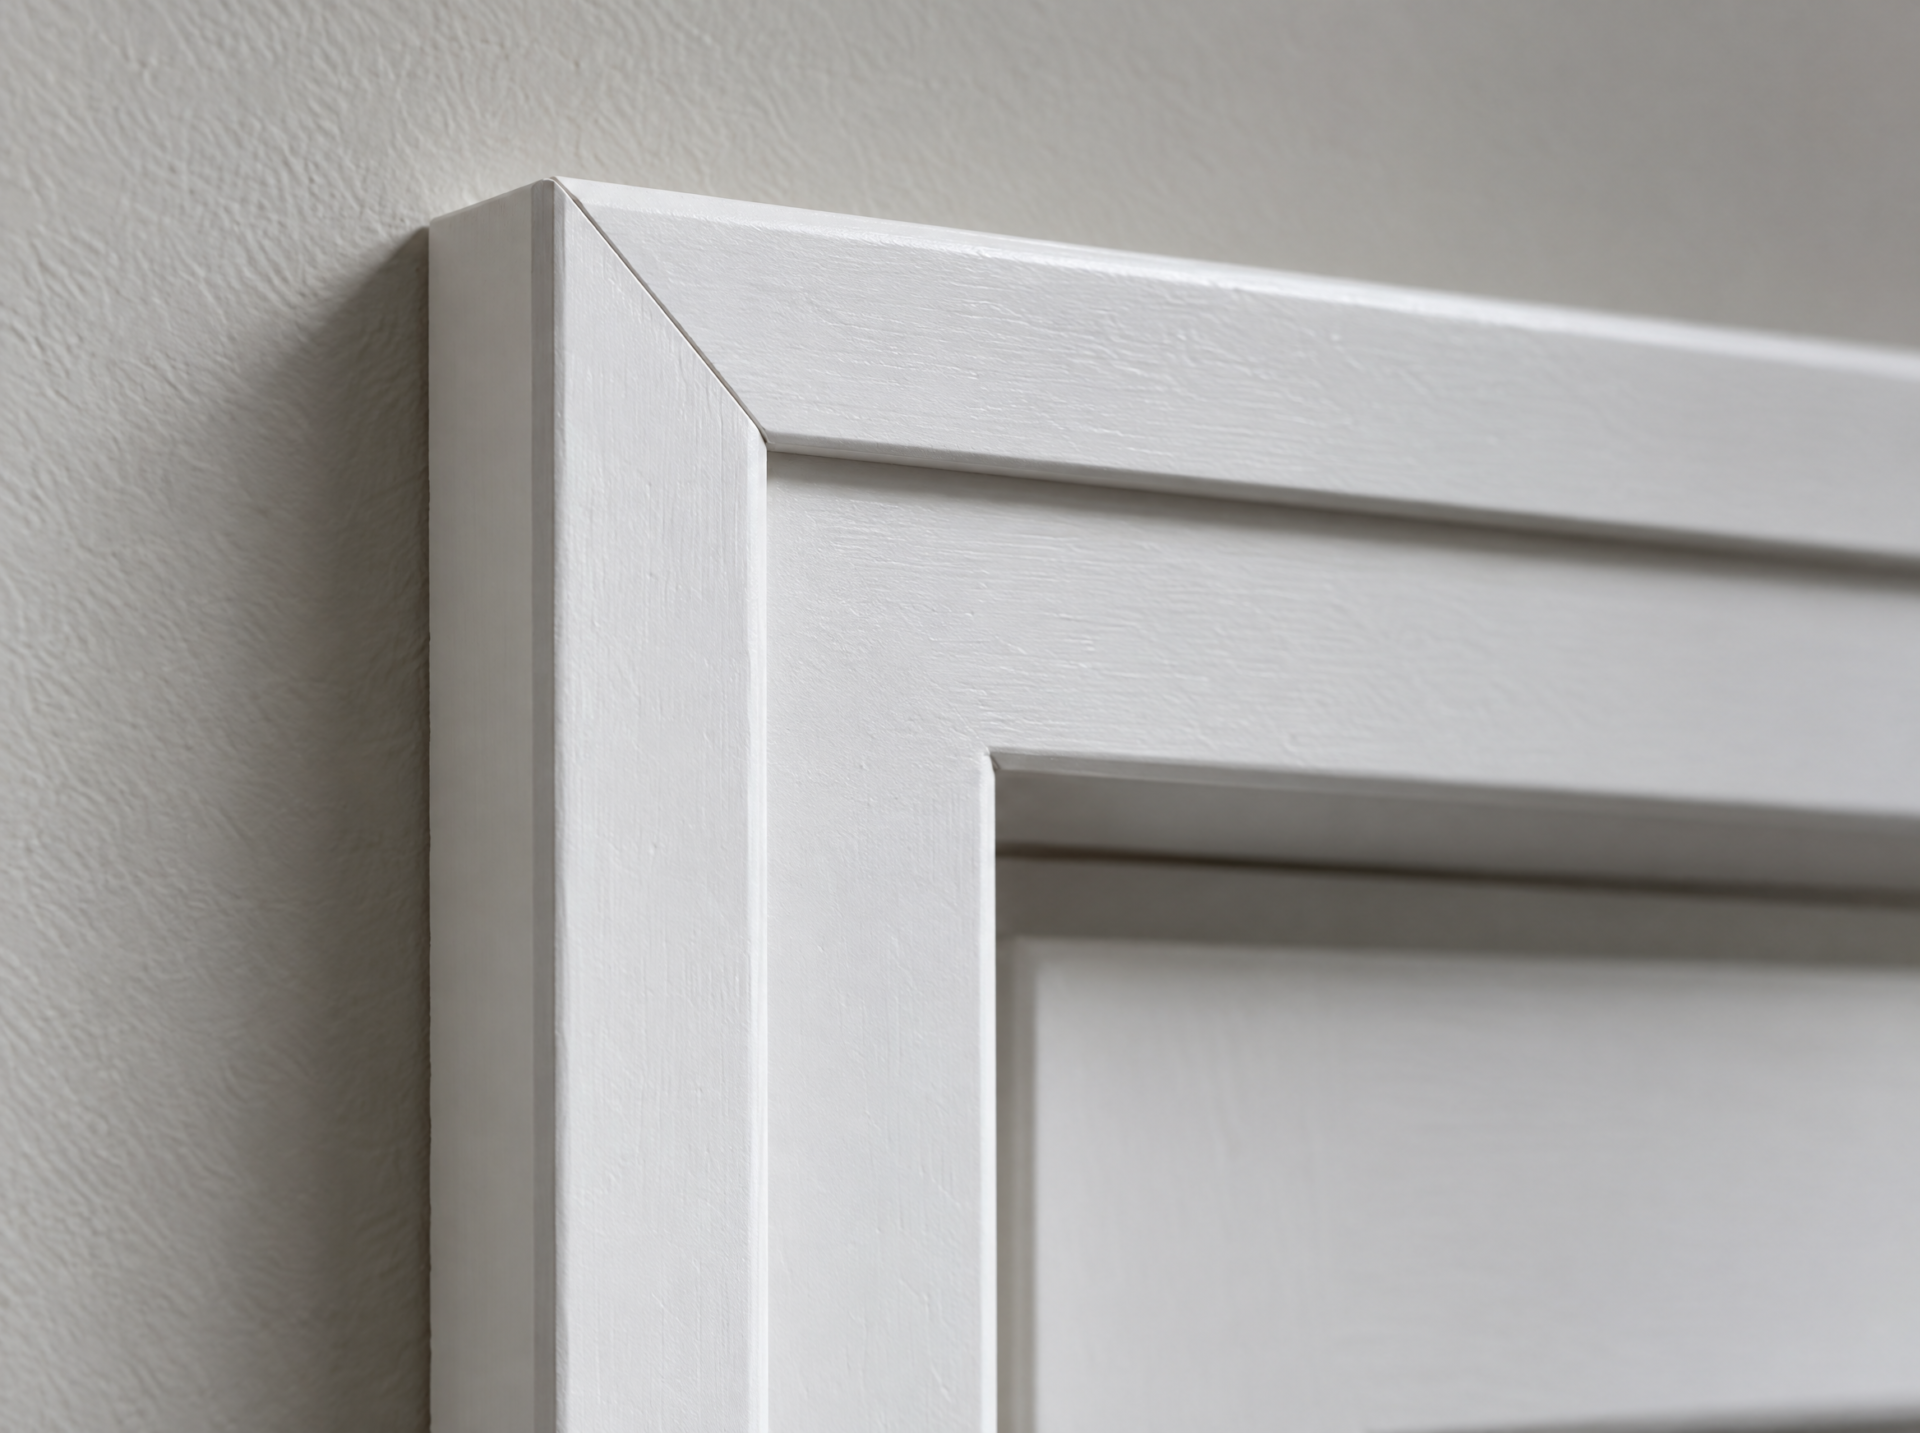
Backband moulding is a narrow profile applied to the outer edge of door casing, window casing or baseboard to add thickness and a shadow line. It makes flat, builder-grade trim read as heavier milled woodwork without removing a single piece of existing casing, which is why it is the cheapest meaningful upgrade in any trim package.
What is backband moulding?
Backband is a small L-shaped or stepped profile that wraps the outside edge of a larger flat moulding. It is not a standalone trim. It has no job on its own, and you will never see it used by itself. Its entire purpose is to give another piece of trim a thicker edge and a crisp line of shadow where that trim meets the wall.
The effect is out of proportion to the material. A 3 1/2 inch flat casing with a backband added reads as a 4 1/2 inch built-up casing with depth to it. Standing in the room, most people cannot tell the difference between that and a single heavier milled profile. What they notice is the shadow.
Backband is sometimes written as two words, back band, and occasionally called backband casing. They all describe the same profile. TMC lists it under Backband.
What backband actually does
It creates depth where there was none
Flat casing sits nearly flush to the wall. Light crosses it without breaking, so the trim looks thin no matter how wide it is. Backband steps the outer edge out past the casing face, and that step catches light on top and throws a line of shadow underneath. That single line is what separates trim that looks specified from trim that looks standard.
It gives wall treatments somewhere to end
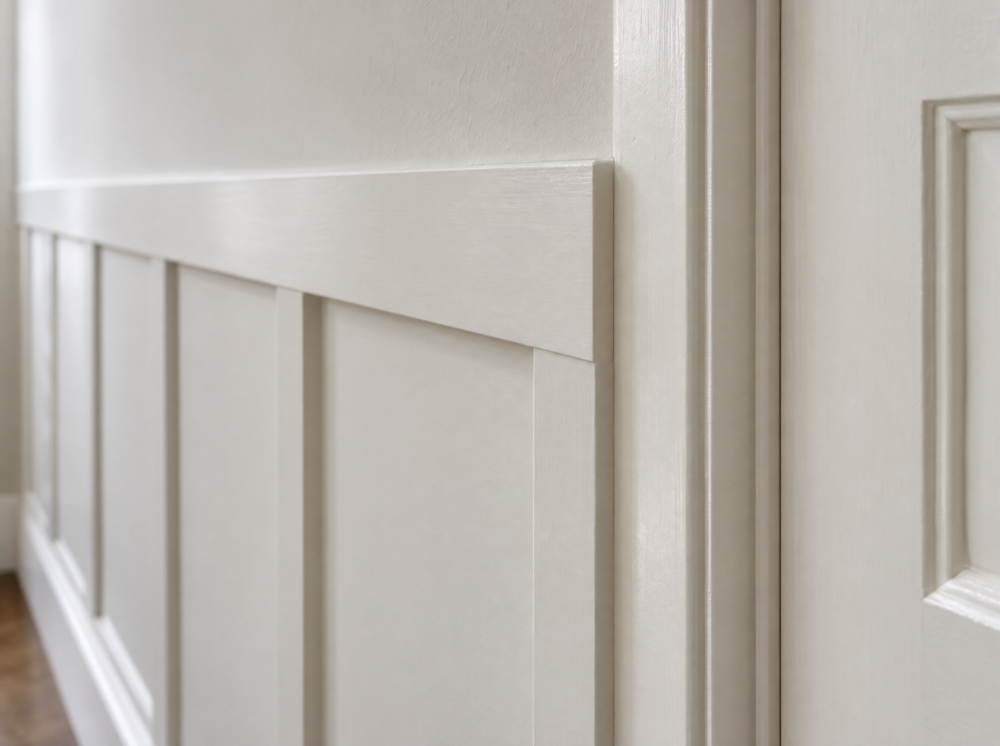
This is the reason finish carpenters reach for it, and the reason almost no buying guide mentions it. Wainscoting, chair rail, board and batten and picture rail all have to stop when they reach a door or window. Running them into the edge of flat casing leaves a visible, awkward joint where two thin pieces butt into each other.
Backband solves it by making the casing thicker than whatever is approaching it. The wall treatment dies cleanly into the side of the backband, and the joint reads as intentional. If you are planning panelling of any kind, decide about backband first, because it changes how every termination in the room is detailed.
It upgrades trim you are keeping
Replacing casing means pulling trim, damaging drywall, patching, repainting and dealing with whatever the old casing was hiding. Adding backband means nailing one narrow piece to the outside edge of what is already there. On a house with sound but plain casing, it is the difference between a weekend job and a full trim replacement.
Backband on doors, windows and baseboards
The profile is the same in all three places. The detailing is not.
Door casing is the most common and the most forgiving. The backband runs up both legs and across the head, mitred at the two top corners, and simply stops at the floor. Nothing complicates it.
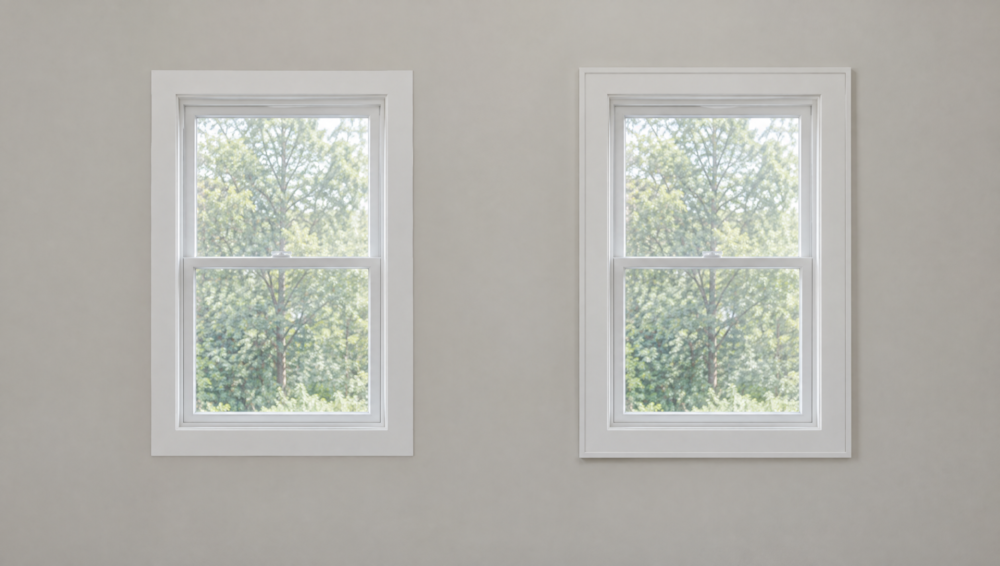
Window casing is where it gets interesting, and where it depends entirely on how the window is trimmed. On a picture-framed window, with casing on all four sides, backband wraps all four and mitres at four corners. On a traditional window with a stool and apron, the backband runs up the legs and across the head, then has to be resolved where the legs land on the stool. The stool needs enough projection to carry the extra thickness. If it does not, the backband hangs over the front edge of the stool and the detail fails. Check that before you buy anything. Our guide to window trim parts covers how the stool, apron and casing relate.
Baseboard uses backband differently. Instead of an outer edge, the backband sits on top of the baseboard as a cap, building a taller two-piece base from stock parts. It is the same idea, thickness and shadow from a small added profile, applied horizontally instead of vertically.
Over existing trim, or starting fresh?
Both work, and the choice changes what you buy.
Over existing trim. The casing is already installed and painted. You are adding backband to its outer edge, nailing into the casing itself and into the framing behind the drywall where you can reach it. The constraint is that your casing’s existing thickness is fixed, so the backband has to suit it rather than the other way round. Measure the casing thickness before choosing a profile.
Starting fresh. You are specifying casing and backband together, so you can pick a pair that steps cleanly. This is the better outcome and the easier install, because you can run the casing slightly narrower knowing the backband will add the visual weight back.
The one thing that ruins a retrofit. If your existing casing sits proud of the drywall because the jamb was set shallow, adding backband makes that error obvious instead of hiding it. The backband needs to land flat on the wall. Run a straightedge across the casing onto the wall before you commit. Where the gap is small, caulk absorbs it. Where it is more than about a sixteenth, the casing needs attention first.
How to choose a backband size
This is the question the buying guides skip, and it has a simple answer: the backband has to be thicker than the casing it wraps, or there is no step and no shadow.
Most flat casing is 11/16 or 3/4 of an inch thick. So a backband of 3/4 of an inch gives you almost nothing, a backband around an inch gives a clear reveal, and anything approaching an inch and a half gives a heavy, traditional step. Wider is not automatically better. In a room with an eight foot ceiling, a heavy backband on every opening can crowd the space.
A working rule: match the weight of the backband to the height of the room and the width of the casing. Tall rooms and wide casing carry a heavy profile. Standard ceilings with 2 1/2 or 3 1/4 inch casing want something modest.
Backband profiles we stock
Five profiles, all held at our four Northern California showrooms.
| Part | Profile | Size as listed | Species | Best for |
|---|---|---|---|---|
| BB002 | Ellen | 3/4″ x 3/4″ | Interior Radiata primed pine | The lightest option. A subtle edge on narrow casing where you want definition without weight. |
| MC023 | Payette | 3/4″ x 1″ | Finger joint pine | The everyday choice. Clear step on standard 11/16 casing, unobtrusive in a normal room. |
| MC033 | Payette | 1 1/2″ x 1″ | Finger joint pine | The same profile family, taller. Suits wider casing and nine foot ceilings. |
| BB001 | Klindt | 7/8″ x 1 3/4″ | Finger joint pine | Broad face, strong shadow. Good where the backband is doing the work and the casing is plain. |
| MC022 | Council | 1 3/8″ x 1 1/16″ | Finger joint pine | The heaviest. Traditional and Craftsman packages, tall rooms, and terminating substantial panelling. |
Sizes are shown as they appear on each product page. Because a backband has one face against the wall and one against the casing, check the profile drawing on the product page to confirm which dimension runs which way before you order. A four inch sample is available on every profile, and on a detail this dependent on the trim it meets, a sample is worth the wait.
All five are paint-grade. Finger joint pine and primed radiata are made to be painted, not stained, which suits backband: it is almost always finished to match the casing so the two read as one piece.
How to install backband
Backband goes on last. Casing first, fully installed and fastened, then the backband to its outer edge. Trying to assemble the two on a bench and install them as a unit sounds efficient and is harder, because any cup or twist in either piece fights you at the wall.
- Mitre the outside corners. Where the leg meets the head, the backband turns a corner in the same plane as the casing, so it takes a standard 45 degree mitre. Cut the head piece first and fit the legs to it.
- Fasten into something solid. Nail through the backband into the edge of the casing, and where the backband overhangs onto drywall, angle a fastener back into the framing at the opening. Brad nails are enough. Backband is small and light and does not need heavy fixing.
- Resolve the bottom. On doors, the backband stops square at the floor. On windows with a stool, it lands on the stool, so check that the stool projects far enough to receive it before cutting anything.
- Caulk the wall line, fill the nail holes. The backband to wall joint will move slightly with the seasons, so it needs flexible caulk, not filler. Nail holes and the mitres take filler.
A mitre saw, a brad nailer and a caulk gun cover the whole job. There is no coping and no compound angle anywhere in it, which is why backband is a reasonable first finish carpentry project.
Where backband goes wrong
Four failures account for nearly all of it.
- Choosing a backband no thicker than the casing. No step, no shadow, no point. The most common and most avoidable mistake.
- Forgetting the stool. Windows get detailed, the backband arrives, and the stool is too shallow to receive it. Decide this before the window trim is installed.
- Rigid filler on the wall joint. It cracks within a season. Flexible caulk on that line, every time.
- Running it on every opening in a small room. Backband adds visual weight. In a tight hallway with four doors, a heavy profile closes the space in. Use a lighter profile, or use it selectively on the openings that matter.
Is backband worth it?
On plain casing you intend to keep, it is the highest return available in trim. You are adding one narrow profile and getting an apparent upgrade to the whole opening. On a house with a dozen doors and windows it remains a small material order and a couple of days of work.
It earns its place least where the casing is already a substantial milled profile with its own depth. There, backband gilds something that does not need it.
If you are not sure how backband sits alongside the rest of a trim package, our interior trim anatomy guide shows how the pieces relate, and the linear footage calculator will size the order once you know which openings you are doing.
Not sure which profile suits your casing? Bring an offcut of your existing trim to any of our four Northern California showrooms and we will match a backband to it while you wait. Find your nearest showroom.
Frequently Asked Questions (FAQs)
Backband is a narrow moulding applied to the outer edge of a larger flat trim, usually door or window casing. The name describes its position: it bands the back, or outer, edge. It adds thickness and a shadow line and is never used on its own.
Three things. It adds apparent depth to flat casing, it gives wainscoting and chair rail a clean place to terminate against a door or window, and it upgrades trim you are keeping rather than replacing. The third is why it is the cheapest worthwhile trim upgrade.
Install the casing first and fully, then add the backband to its outer edge. Mitre the two top corners at 45 degrees, fasten with brad nails into the casing edge and the framing, then caulk the wall joint with flexible caulk and fill the nail holes.
It must be thicker than the casing it wraps or there is no step and no shadow. Most flat casing is 11/16 or 3/4 of an inch, so around an inch gives a clear reveal and an inch and a half gives a heavy traditional step. Match the weight to the room height.
Yes, and it is the usual reason people buy it. Nail it to the outer edge of casing that is already installed. Check first that the casing sits flat to the wall, because backband makes a proud casing more obvious rather than hiding it.